
The Best Way to Mix Resin and Hardener

Epoxy resin is a versatile and popular material for crafting, woodworking, and various DIY projects.
Achieving the perfect resin cure starts with mastering the art of mixing the resin and hardener in not only precise, proper proportions, but in a way that keeps bubbles out of the resin, and mixed well enough that you don't get soft spots in your cured piece.
In this guide, we're going to walk you through the steps, techniques, and tips to so that your resin projects are a success, and yes, it is not just as straightforward as "mixing the resin and hardener".
The Importance of Proper Resin Mixing
Before we dive into the all of the details of how to mix resin properly and the importance of mixing epoxy resin and hardener well, let's understand why it is so important, first.
Achieving a Strong Bond of Resin and Hardener
Properly mixed epoxy resin and hardener form a chemical bond that creates strength and durability in your projects.
Incomplete or inaccurate mixing, and even not mixing your epoxy resins well enough can lead to structural issues including:
- sticky or tacky spots on your cured resin
- partially cured epoxy
- resin that bends
- cloudy resin
- soft resin
If you don't mix your resin really well, it can result in patches of uncured or sticky resin, ruining the appearance and functionality of your handmade creations.
So it's pretty important to mix your subsequent epoxy coats properly so your resin and hardener molecules can bond together and form that perfect chemical reaction.

Let's explore a few more aspects of resin mixing to keep in mind. These are important steps to getting that perfect epoxy coating or cast.
Gathering Your Resin Materials
To start the mixing process, ensure you have the necessary materials at your disposal for your epoxy resin system. That may or may not include a number of items as well as the resin and hardener, to make your resin creating easier.
What You'll Need for Resin Supplies
For your resin supplies, you will need
- The proper resin for your project (ie: deep casting resin, uv resin, a high viscosity resin... etc)
- The proper gloves (get nitrile, not latex. Latex will not protect your skin from chemical interaction)
- A respirator for resin - this is a must have piece of equipment, make sure it has the proper filters
- Your resin colorants (mica powders, dyes, acrylics.... etc)
- A mixing cup for resin and hardener and several other cups (disposable or reusable for resin)
- Stir sticks or mixing sticks (wood is fine, silicone is better)
- Your resin molds or anything else specific to your resin project
- Something to cover your resin as it dries so no dust or small particles land on your piece
- A resin heat gun
-
Any other added extras like inclusions, glitter, markers, gold foil or leafing, or anything else you would like to add to your resin mixture
Resin Safety
We always talk a little bit about resin safety in our articles because we find it is not something that is really openly discussed in the epoxy world.
It is absolutely necessary to at least know why we recommend wearing the proper protective gear when working with resin.
Epoxy resin is a chemical that you need to work with safely, like most other chemicals. You don't want to be breathing the fumes in or getting it on your skin, as this could cause an allergic reaction.
Some people don't experience this reaction, typically contact dermatitis, but rather, it can happen over many unmasked exposures. It can also affect your respiratory tract, like other chemicals that are accidently inhaled.
Resin Respirator
We highly recommend investing in a good respirator that will protect your face and lungs from resin exposure.
Even if your brand of resin is "non-toxic", that doesn't not mean it is non toxic once the resin and hardener are mixed, as this creates a completely new compound with a new chemical reaction.
Here I am with my 2 resin masks (I prefer my full face mask, the one I am actually wearing here):

Please, always wear the proper respirator for resin with the right filters.
See the resin respirator we personally wear and recommend here
Resin Gloves
Also, mentioned in a previous statement above, opt for nitrile gloves. Latex gloves are great for protecting skin from bacteria in a medical setting, but will not help with chemical interactions.


These are the gloves we recommend wearing for resin
Ours are in pink, nut you can get the same brand in black as well.
Now, let's get into the details of mixing your resin and hardener.
How To Mix Resin and Hardener
Now, we will talk about mixing epoxy resin and hardener. Here are the steps we will cover:
- Measuring
- Mixing ratio
- Measuring cups
- Mixing techniques
- Avoiding bubbles
- Pouring
- Curing and drying
Measuring Resin and Hardener
Accurate measurement is step one to the key to a successful resin project. This is also where many people go wrong.
The resin and hardener are mixed together by ratio, and this is a measure of volume, not weight.
This is very important to know when measuring resin.
The Mixing Ratio of resin and hardener
The resin to hardener mixing ratio will be so much of part a, (the resin) mixed with so much of part b (the hardener). Once mixed, these two parts make a chemical reaction so your resin is pourable and will cure to a hard, clear, glossy finish.
The mixing ratio is specific to your resin brand, and this is dependent on the chemical composition of that specific brand of resin. So read the instructions well. You will likely see a 1:1 mixing ratio, or maybe a 2:1. Find a measuring cup and mark how much resin and how much hardener you will need.
For example, 1:1 resin:hardener could be 1 cup of resin and 1 cup of hardener mixed together in a container that will hold 2 cups.
Which Measuring Cups to Use
If you are going to use measuring cups, just know, that you will not be able to clean them. Your used mixing container will either go into the trash afterwards or will become your art cups.
Disposable and Reusable Cups for Resin
You can use disposable cups or a mixing container that you will throw out afterwards if you plan on making many projects with epoxy. If you are trying to achieve the perfect color, you may opt for a clear mixing container in the form of a disposable cup.
Or if you want to be more environmentally conscious, you can use silicone cups, as the leftover resin will simply peel away from the surface once it has cured, ready for use again.
We recommend these reusable silicone cups from Amazon for resin and hardener
Mixing Techniques
Believe it or not, the way you mix epoxy resin and hardener impacts the final outcome. Here are some easy techniques you can apply for each epoxy mixture.
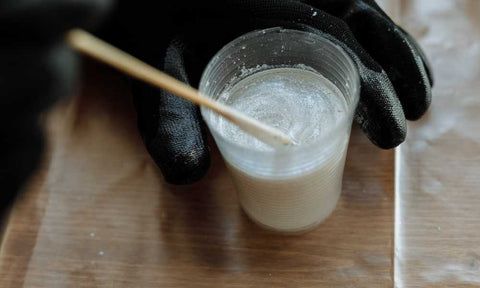
Gentle and Thorough Stirring
This may seem like such a small step that it wouldn't matter, but in fact it does matter. Stirring such a thick substance so quickly can trap micro bubbles right into your mixture.
When you pour your mixed epoxy, if you have not mixed it very gently, you will have to work twice as hard at getting those bubbles out.

Mix Epoxy Resin & Avoiding Overmixing
Overmixing, I would say, is not as important as gentle and thorough stirring of the mixed epoxy because there is such a fine line between mixing well and overmixing, so it is hard to get this step absolutely perfect.
So just keep in mind that if you have been mixing resin for a very long time, you may be overmixing and again this can cause more bubbles.
Getting Bubbles Out of Resin
Getting bubbles in your mixed resin is so common, and they can easily destroy a project. Here are some things you can do to get bubbles out of your epoxy resin.
Popping Surface Bubbles
You will notice I listed a heat gun in the above list of epoxy resin supplies, and this is the reason why. Once you have poured your resin, or your resin layer, you can use a heat gun to heat the resin and hardener combination to a point where the bubbles will float to the surface and pop.
This is once of my favorite parts of the entire process actually because it is so satisfying watching the bubbles break the surface that you didn't even realize were there!
Some people use a torch for this, but a flame torch is harder to control and can actually burn your epoxy. It is important to maintain a consistent epoxy resin temperature to get it perfect.
This is a heat gun we recommend from Amazon
You can also look for a pressure pot for your resin casts, this give you a crystal-clear resin finish, totally buble-free.
See the resin bubble machine here

Pouring and Spreading the Resin Mixture
Once you've achieved a well-mixed epoxy resin and hardener mixture, it's time to pour and spread it into your mold or surface.
Ensuring an Even Coat
Pour evenly and allow time to let it settle into place so you don't overpour. Most epoxy resins are self levelling, so watch where it goes and you can help spread it out using a disposable wooden stir stick or a reusable silicone tool.
Curing and Drying
Understanding the epoxy curing process is vital for a successful project, so it is very important to understand how an epoxy application cures as well as what the initial cure phase is all the way through to the final cure phase.
Epoxy cure time varies in different stages, and if you understand these phases you will know when you have thoroughly cured epoxy.
Factors Affecting Curing Time
When it comes to curing time, there are three different timings to be aware of:
- Soft cure: A few hours. This is the point where your resin sets, but don't touch it or let anything fall on the surface! It could still stick or leave marks.
- Hard cure: 24 hours. This is where the resin appears cured but inside may still be pliable.
- Full cure: This happens around 72 hours (or longer depending on the size and depth of your pour). At this stage, your resin project is fully cured and is ready for display or further polishing steps.
This rule generally applies to deep casts as well as an epoxy coating, so it is a good rule of thumb to follow as long as you are working in ideal temperatures and conditions.

It is also advisable to cover your curing epoxy with glass or foam containers or lids so no hair, dust or debris fall onto your drying epoxy layer.
Summary
Achieving a perfect mix of epoxy resin and hardener is crucial for the success of your projects. From understanding the importance of proper mixing to mastering the techniques, you're now equipped to create stunning resin creations.
Frequently Asked Questions (FAQ)
Q1: What happens if I don't mix the epoxy resin and hardener properly?
Improper mixing can result in a weak bond, uncured or sticky resin, and compromised project quality. It's essential to follow precise mixing instructions.
Q2: Can I mix different epoxy resin brands together?
Mixing different epoxy resin brands is not recommended, as they will have different formulations that can lead to unpredictable results. Stick to one brand for consistency and for best results.
Q3: Can I speed up the curing process?
While you can adjust curing times by manipulating factors like temperature, it's best to follow the manufacturer's recommendations to ensure the best results and project durability for all the epoxy layers.
Here are some other epoxy resin resources for you:
Resin How To's
Resin Supplies & Purchasing Advice
Best Resin For Your Project
USE RESIN SAFELY
No matter what type of resin you decide to use, always use personal protective equipment (PPE). Take time to carefully go over safety data sheets before making anything with resin, and make sure you have the proper gloves on (not latex) and the right respirator for resin protection.
Here are the exact gloves we always use
This is the respirator we use and recommend for resin work
Read more about resin safety here
And please remember, even if your epoxy resin of choice is "VOC-free, odor free" and/or "non toxic", please always wear the proper respirator for epoxy resin.
Here is the BEST respirator mask for epoxy resin: this Full Face Organic Vapor Respirator checks off all of the boxes for resin safety, and comes with
- free 30 day returns
- a 1 year factory warranty
- free US shipping and free shipping on international orders
Here it is:

Want more resin tips? Follow us on Instagram! 👇

Happy creating!